
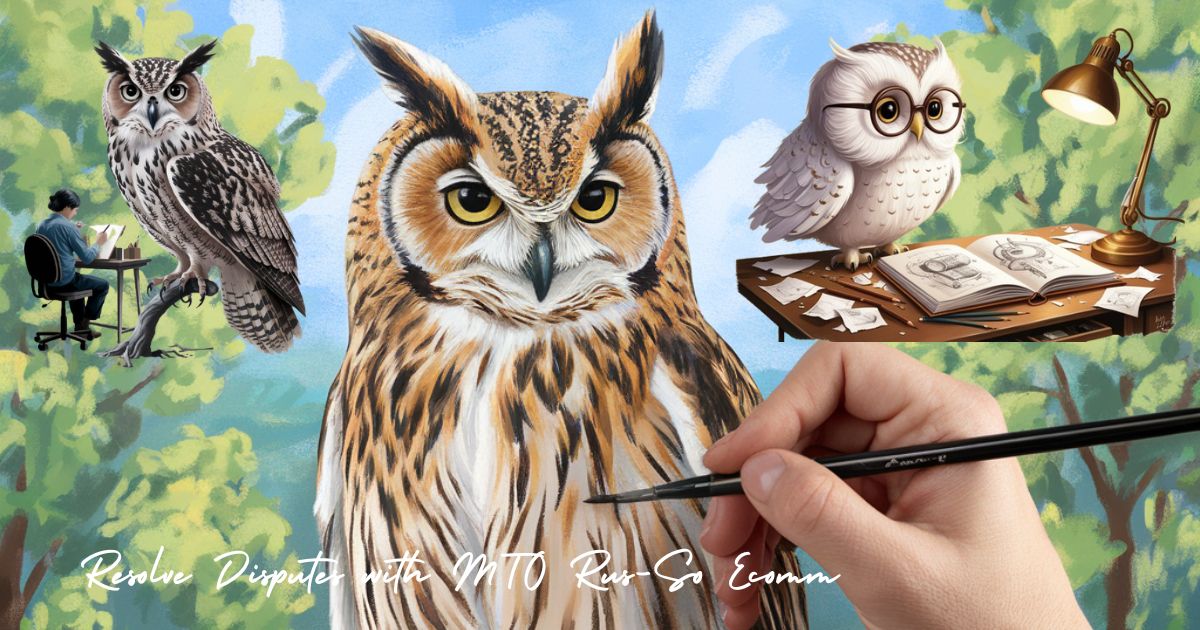
Drawing owls has long captivated artists with its blend of technical challenge and creative expression. The “drawing:lfgxzvm9-r8= owl” technique offers a structured approach to capturing these enigmatic birds on paper.
Whether you’re a budding artist or a seasoned pro looking to refine your skills, this comprehensive guide will walk you through the intricate process of creating stunning owl artwork.
Essential Materials and Tools for Owl Drawing
To embark on your owl drawing journey, you’ll need the right arsenal of tools. Let’s dive into the essentials:
- Pencils: A range of grades from H (hard) to B (soft) is crucial. Hard pencils (2H, H) are perfect for initial sketches and light outlines, while softer pencils (2B, 4B, 6B) add depth and richness to your shading.
- Paper: Choose medium to heavy-weight paper that can withstand multiple layers and erasing. Cold-pressed or rough paper adds texture, mimicking feathers, while smooth paper is ideal for fine details.
- Erasers: A kneaded eraser is indispensable for lifting graphite and creating highlights. Pair it with a vinyl eraser for clean, precise erasing.
- Blending tools: Blending stumps and tortillons are essential for smoothing transitions and creating soft textures in your owl drawings.
- Charcoal pencils: These offer deep, rich blacks and are excellent for creating dramatic contrasts in your owl artwork.
- Optional extras: Colored pencils can add a touch of vibrancy, while watercolors or ink can be used for mixed media approaches.
| Tool Type | Recommended Options |
| Pencils | 2H, H, HB, 2B, 4B, 6B |
| Paper | Cold-pressed, Rough, Smooth (140lb weight) |
| Erasers | Kneaded, Vinyl |
| Blending | Stumps, Tortillons |
| Optional | Charcoal pencils, Colored pencils, Watercolors, Ink |
Remember, while having good tools is important, it’s your skill and practice that truly bring an owl drawing to life. Experiment with different materials to find what works best for your style and the effects you want to achieve.
Understanding Owl Anatomy for Accurate Drawings
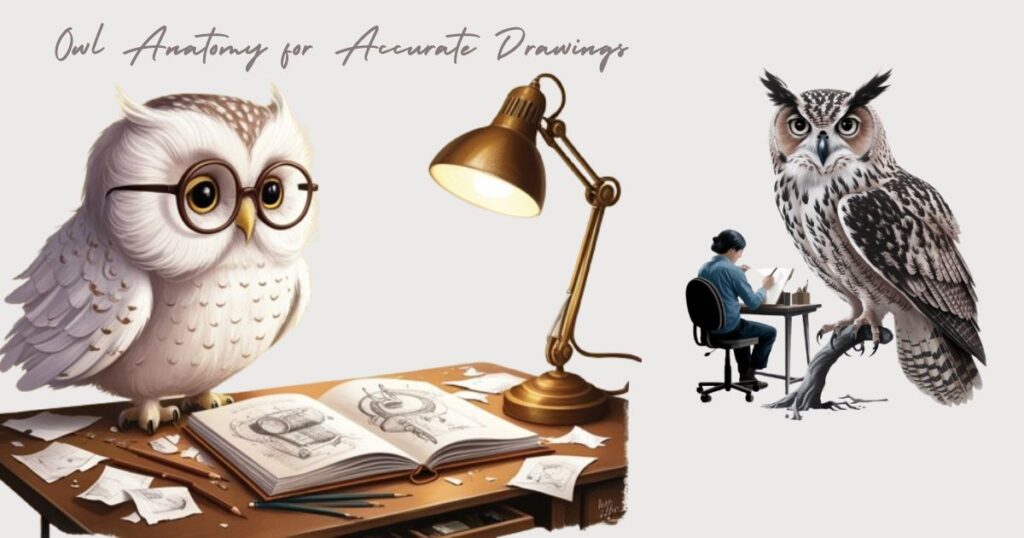
To master drawing:lfgxzvm9-r8= owl, you must first understand their unique anatomy. Owls possess several distinctive features that set them apart from other birds:
Eyes: Large, forward-facing eyes are an owl’s most striking feature. They’re fixed in their sockets, which is why owls can rotate their heads up to 270 degrees. The eyes are often described as “windows to the soul” in owl artwork, so capturing their depth and intensity is crucial.
Facial disc: This circle of feathers around the eyes helps funnel sound to the owl’s ears, enhancing their hearing. The shape and prominence of the facial disc vary among owl species, so research your specific subject.
Beak: Typically short and curved, perfect for tearing prey. The beak is often partially hidden by facial feathers, adding to the owl’s mysterious appearance.
Feathers: Owls have several types of feathers, each serving a specific purpose:
- Downy feathers for insulation
- Contour feathers for shape and flight
- Specialized facial disk feathers for sound direction
Wings: Owl wings are broad and rounded, adapted for silent flight. Pay attention to how they fold against the body when the owl is at rest.
Talons: Sharp and powerful, these are essential tools for hunting. When drawing perched owls, notice how the talons grip the branch or surface.
Understanding these elements will help you create more realistic and captivating owl drawings. Pay close attention to the symmetry of the facial features and the layering of feathers across the body.
For added inspiration, consider looking at moving= GIF Wallpaper of owls to better understand their natural movement. Studying owl skeletal structures can also improve your understanding of their posture and proportions.
Step-by-Step Guide to Drawing an Owl
Now, let’s break down the process of drawing:lfgxzvm9-r8= owl into manageable steps:
Basic shapes: Start with simple geometric forms. A large circle for the body and a smaller one for the head form the foundation. Add an inverted triangle for the beak and ovals for the eyes.
Refine the silhouette: Adjust the basic shapes to create a more accurate owl outline. Consider the species you’re drawing – some owls are stockier, while others are more elongated.
Facial features: Sketch the facial disc and position the eyes symmetrically. Add the beak and ear tufts if present. Remember, owl eyes are fixed forward, giving them their characteristic “wise” look.
Body outline: Define the wings, tail, and legs, paying attention to the owl’s posture. Are the wings folded or slightly open? Is the owl perched or in flight?
Feather detail: Begin with larger feather shapes and gradually add finer details. Use reference images to understand feather direction and layering. Start with the major feather groups before adding individual feathers.
Texturing: Employ various pencil strokes to create feather textures. Short, overlapping lines work well for downy feathers, while longer strokes suit wing feathers. Experiment with pressure to create depth and volume.
Shading: Build depth by adding shadows and highlights. Remember, the direction of your light source will dictate where these fall. Owls often have intricate patterns in their feathers, so pay attention to how light and shadow interact with these.
Eyes and beak: Detail these crucial features. The eyes should have depth and a lifelike gleam. The beak should show its curved structure and any variations in color or texture.
Background elements: If including a background, sketch in any perches, branches, or environmental elements. These can add context and enhance the overall composition.
Refinement: Step back regularly to assess your work. Adjust proportions and add final touches to bring your owl to life. Don’t be afraid to use your eraser to lighten areas or correct mistakes.
“In drawing, nothing is better than the first attempt.” – Pablo Picasso
This quote reminds us that spontaneity often captures the essence of our subject. Don’t be afraid to trust your initial instincts when drawing:lfgxzvm9-r8= owl. Sometimes, the energy and immediacy of a first sketch can convey more character than a highly polished piece.
Exploring Different Styles and Techniques
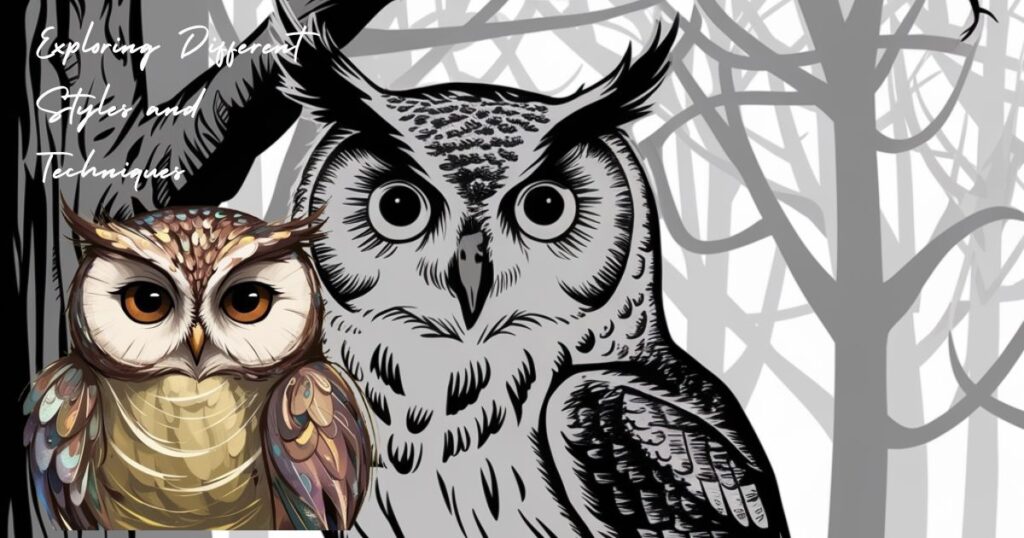
The world of owl art is diverse, offering numerous styles to explore:
- Realistic: Focus on accurate proportions, detailed feather textures, and lifelike shading. This style requires patience and keen observation. Study photographs or, if possible, live owls to capture the subtleties of their appearance.
- Stylized: Exaggerate certain features for effect. Perhaps enlarge the eyes or simplify feather patterns for a more whimsical look. This approach can be great for children’s book illustrations or graphic design projects.
- Abstract: Play with shapes and colors, breaking down the owl into basic geometric forms while maintaining its essence. This can lead to striking, modern interpretations of owl subjects.
- Mixed media: Combine drawing with watercolors or ink for unique effects. Try using ink for sharp outlines and watercolors for soft, ethereal backgrounds. This can create a beautiful contrast between the precise details of the owl and a more impressionistic environment.
- Minimalist: Use as few lines as possible to suggest the owl’s form. This can be a challenging but rewarding exercise in capturing the essence of your subject with economy of means.
- Digital drawing: Explore digital tools and software to create owl artwork. This medium offers unique possibilities for layering, color experimentation, and easy editing.
Case Study:
Artist Jane Doe transformed her realistic owl drawings into a popular children’s book series by adopting a more stylized approach. She found that simplifying the owl’s features made them more appealing to young readers while maintaining the bird’s captivating presence. Her process involved:
- Starting with realistic sketches
- Gradually simplifying forms and exaggerating key features
- Developing a consistent color palette
- Creating expressive poses to convey emotions
This evolution in style not only made her work more accessible to children but also opened up new creative possibilities in her art.
Tips for Beginners and Common Mistakes to Avoid
As you embark on your owl drawing journey, keep these tips in mind:
- Start simple: Focus on basic shapes before diving into details. Master the overall form before worrying about individual feathers.
- Use reference images: Study real owls or high-quality photographs to understand their structure and features. But don’t be afraid to combine elements from different references to create your unique owl.
- Practice regularly: Set aside time for daily sketching exercises. Even quick, 5-minute sketches can improve your skills over time.
- Be patient: Building skill takes time. Embrace the learning process and don’t get discouraged if your early attempts don’t meet your expectations.
- Experiment with materials: Try different pencils, papers, and techniques to find what works best for you. Each medium can bring out different aspects of your owl subjects.
- Study light and shadow: Understanding how light falls on an owl’s form can dramatically improve the realism and depth of your drawings.
- Join an art community: Share your work and get feedback from other artists. Online forums or local art groups can be great sources of support and inspiration.
Common mistakes to avoid:
- Disproportionate features (especially oversized eyes)
- Lack of symmetry in facial features
- Overworking the drawing, losing spontaneity
- Neglecting the overall composition while focusing on details
- Inconsistent light source, leading to confusing shadows
- Flattening the form by not considering the owl’s three-dimensional structure
Remember, every artist’s journey is unique. Don’t be discouraged by comparing your work to others. Instead, focus on your progress and enjoy the process of mastering drawing= Car Body Styles, just as you would with drawing= owl.
FAQ’s
What is the “drawing:lfgxzvm9-r8= owl” technique?
This technique emphasizes a structured approach to owl drawing, focusing on accurate anatomy, detailed texturing, and capturing the owl’s essence through careful observation and practice.
How can I improve my owl drawing skills?
Practice regularly, study owl anatomy, use reference images, experiment with different techniques, and don’t be afraid to make mistakes. Each drawing is a learning opportunity.
What materials should I use for drawing:lfgxzvm9-r8= owl?
Essential materials include a range of pencils (H to B grades), quality paper, erasers, and blending tools. Additional materials like charcoal pencils or colored pencils can enhance your drawings as you advance.
How do I add texture to owl feathers?
Use varied pencil strokes to mimic different feather types. Short, overlapping lines work well for downy feathers, while longer, sweeping strokes can represent wing feathers. Experiment with pressure and blending to achieve different textures.
Conclusion
Mastering the art of drawing:lfgxzvm9-r8= owl is a rewarding journey that combines technical skill with creative expression. By understanding owl anatomy, practicing various techniques, and exploring different styles, you can create captivating owl artwork that truly stands out.
Remember, the key to improvement lies in consistent practice and a willingness to experiment. Don’t be afraid to push your boundaries and develop your unique style. Whether you’re aiming for hyper-realistic portraits or whimsical owl characters, the skills you’ve learned here will serve as a solid foundation.
As you continue your artistic journey, keep exploring, keep learning, and most importantly, keep drawing. The world of owl art is vast and filled with possibilities. Your next masterpiece awaits!